Tuesday, 2013-04-19
Building Low Tunnels with Quick Hoops
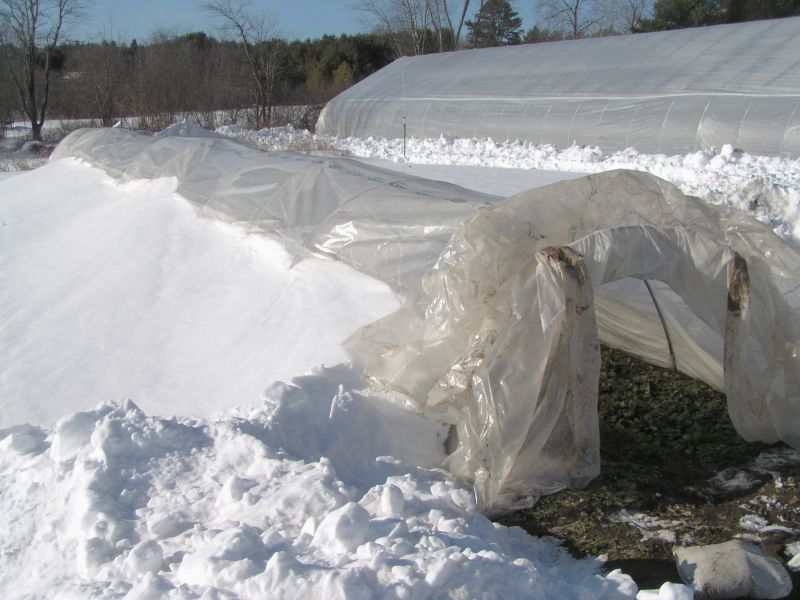
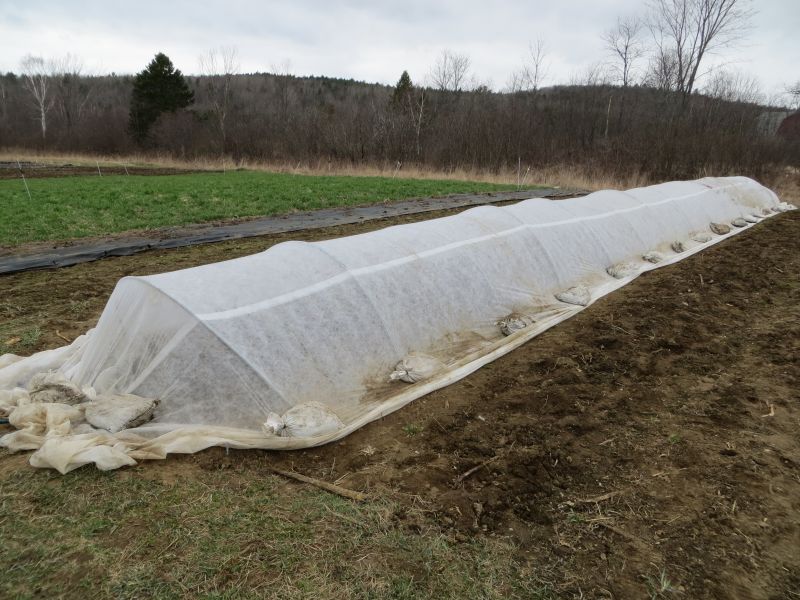
Quick hoops support low tunnels which can stand up to a snow load and provide much of the season extension capability of a high tunnel at a fraction of the cost.
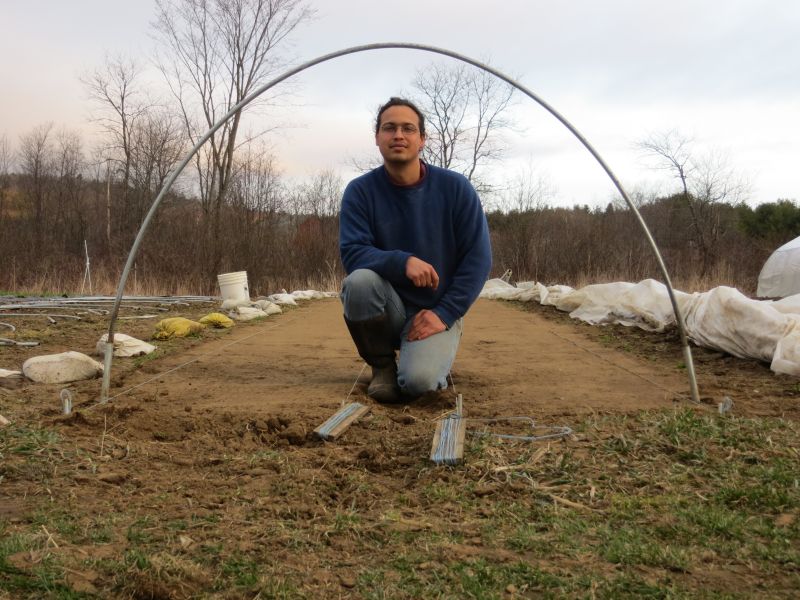
The hoops are made from 1/2" EMT (Electrical Metallic Tubing), which is thin-walled galvanized steel tubing. It comes in 10' sticks for about $2 each. It provides a nice balance between finished hoops which are strong enough to support a lot of weight, and being thin-walled enough that you can easily bend it by hand over a home-made form.
A 10' length of tubing gives us a half circle with about a 3'2" radius. So standing on the ground, the hoops are about 6' wide and 3' high. This allows us to cover two 30" beds with a 12" path down the middle, using over 80% of the covered space to grow plants, without making it too hard to get between the beds to weed and harvest. Our whole market garden (seventy-something 60' beds) is laid out in pairs of beds like this, with a wider (2') path between each pair for easier access.
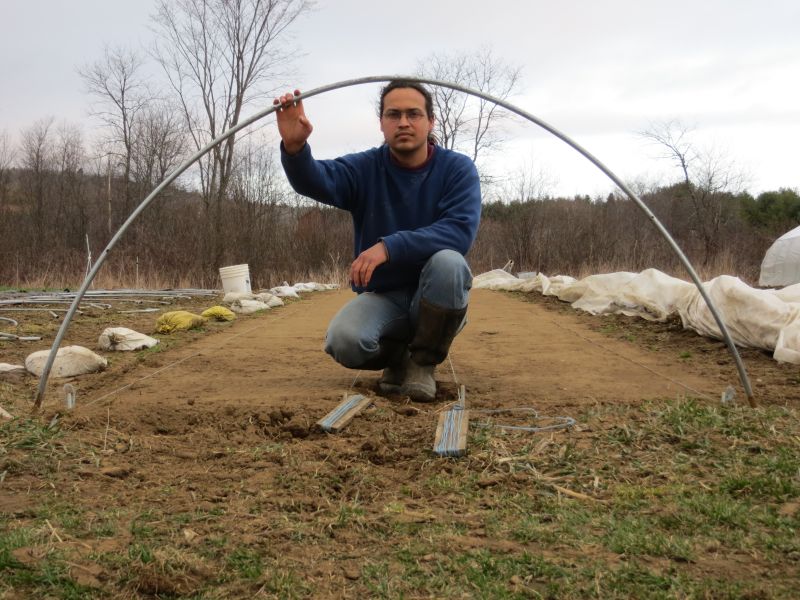
We stick them into the ground 6-8", giving us a tunnel about 30" high. This also allows us to use 10' wide material for the cover and have enough extra on both sides to weight it down. It is important to measure and set them so they are 6' wide. At that width they will stand up to anything Old Man Winter wants to throw at them, but if you stretch them six or eight inches wider they may collapse if we get a lot of heavy snow.

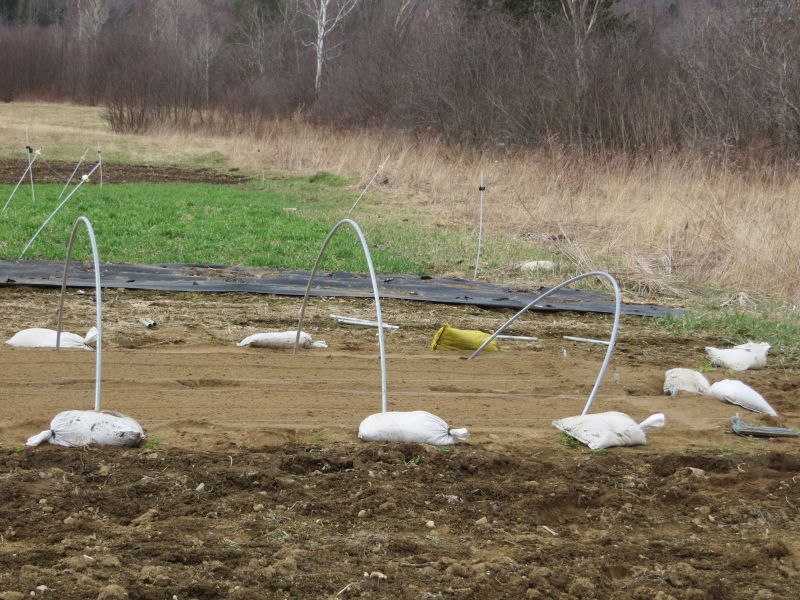
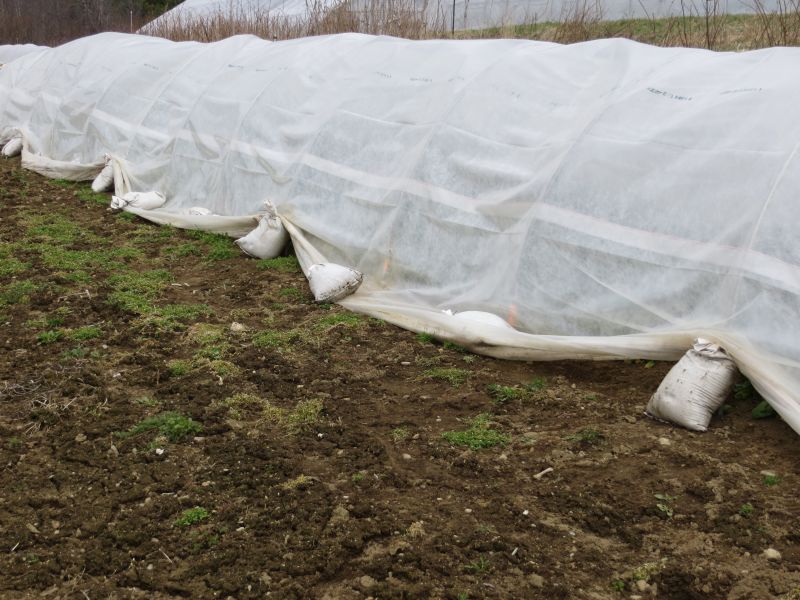
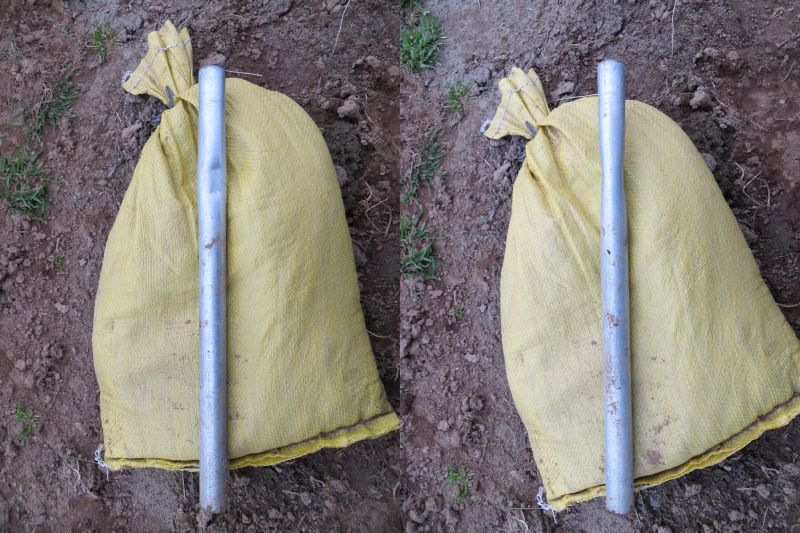
We put one hoop every four feet along the bed. So to find the number of hoops you need, divide your bed length by 4' (to get the number of spaces) and add one (the other end bow). The quickest way to set them up is to have one person holding the bundle of hoops and backing up along the bed, and handing them one at a time to a second person who sticks one end in the ground. Once they are all in, you can go back along and shove the other end in the ground. The end hoops tend to collapse inward over time, so we are experimenting with setting them out at an angle to help resist that. To hold the cover down, we use an (approximately) 17-pound sandbag at each end of each bow, and two at each end of the tunnel to hold the ends down.
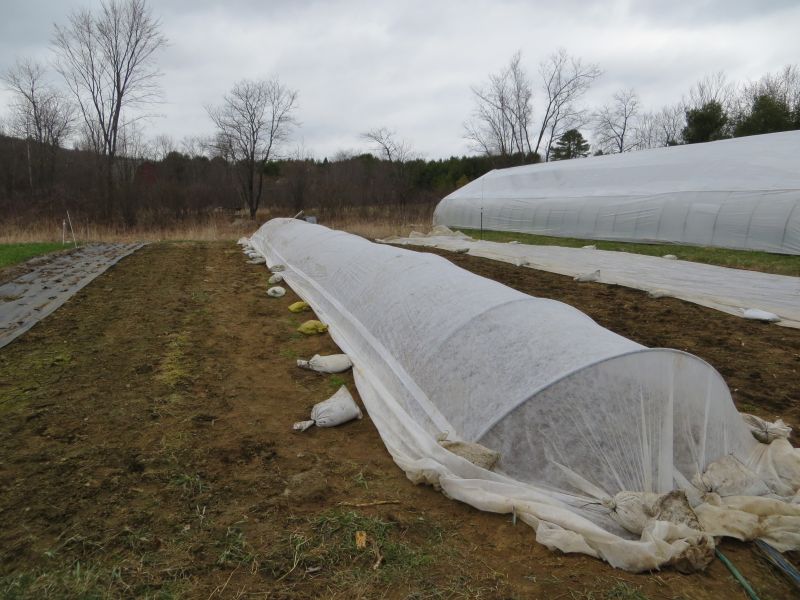
Then we cover the hoops with spun-bonded polyethylene row cover fabric. You need it to be the length of your tunnel plus about 4' at each end. The fabric comes in different weights—we use one that is about half an ounce per square yard. According to Elliot Coleman, this is the best long-term tradeoff between light transmission (gaining heat during the day) and insulation (holding heat at night). This gives a few degrees of frost protection and (perhaps more importantly) provides a protected environment so that cold-hardy plants can survive even if they do freeze.
You want to get the cover nice and even and snug -- if it can flap it will wear faster and be more likely to pull loose in high winds. This is best done on a relatively calm day and with two people. Start by stretching the cover out and placing both ends so that it's snug and straight along the length of the tunnel. For longer tunnels, especially if there is wind, you probably also want to tack it down in the middle somewhere.
Then put on the rest of the sandbags along both sides, making sure it stays straight and that there is an even amount of fabric on both edges. For short home-garden tunnels you can probably just do this in any order. But for longer tunnels I like to start at the middle and work out toward one end and then the other, pulling any slack out towards the ends as I go along. Again, this is best with two people, one on each side of the tunnel.
Once we start getting to the point where the night-time temperatures are usually down in the low 20s, we put on a layer of clear greenhouse plastic over the row cover, weighting it down with the same sandbags. Follow the same procedure as when putting on the row cover. The plastic tends to be a little trickier, as it doesn't stretch at all, so it is harder to get it free of wrinkles. Take your time and get it right, as wrinkles in the plastic will really catch the wind and tend to make it pull loose over time.
Once the plastic is on, I usually check on it and snug it up after a major storm or a few days of gusty wind. I just walk all around it and pull it snug anywhere I can see that it has started to work loose.
You have to be careful once the plastic is on because it can really heat things up. Above about 100° you can start damaging your plants. To ventilate, you can take every second or third sandbag, lift the plastic, and stand the sandbag against the bow as a prop to hold the plastic off the ground. If you do this on both sides it will allow some cross-wise air flow which seems to do a good job of keeping the temperature reasonable.
To get at your beds to harvest or weed or whatever, we usually roll all the sandbags off one side and pull the row cover back over to the other side. But once it starts getting cold enough for the soil outside to freeze, the row cover (especially under the sandbags) will freeze down and you won't be able to get it loose without tearing it. So it's difficult to get in there for winter harvesting. You can keep one end open by sandbagging down only the plastic and tucking the end of the row cover farther inside so it won't freeze down. But as you could see from that first picture with the hoop in the ground, these are really too low to get inside comfortably.
So what we have done is to use 3/4" EMT, which fits nicely over the 1/2" EMT, for extension posts to make the tunnel taller. We cut 15" lengths (so you get an even eight posts from a 10' stick) and pinch them slightly with a vice about 3" down so the hoop doesn't slide in too far.
This adds 12" to the height and gives us a tunnel which is about 42" tall, which I find fairly comfortable to work in. You could probably go taller yet, but the wind load goes up very quickly as the tunnel gets bigger, so you would probably have trouble keeping the cover on. It is already noticeably worse at this size than with the plain hoops.
For these extended tunnels you need at least 5' of extra cover at each end of the tunnel, and it has to be at least 12' wide. This is no problem for the plastic—you can usually get it in 2' increments from 10' up to 48' or so. But up until recently the row cover only came up to 10' wide unless you special ordered a large roll. But things are getting better; several people now stock widths in the 13-15' width range.